

Part 2: Installing and Configuring containerd for Kubernetes

Why the container runtime matters
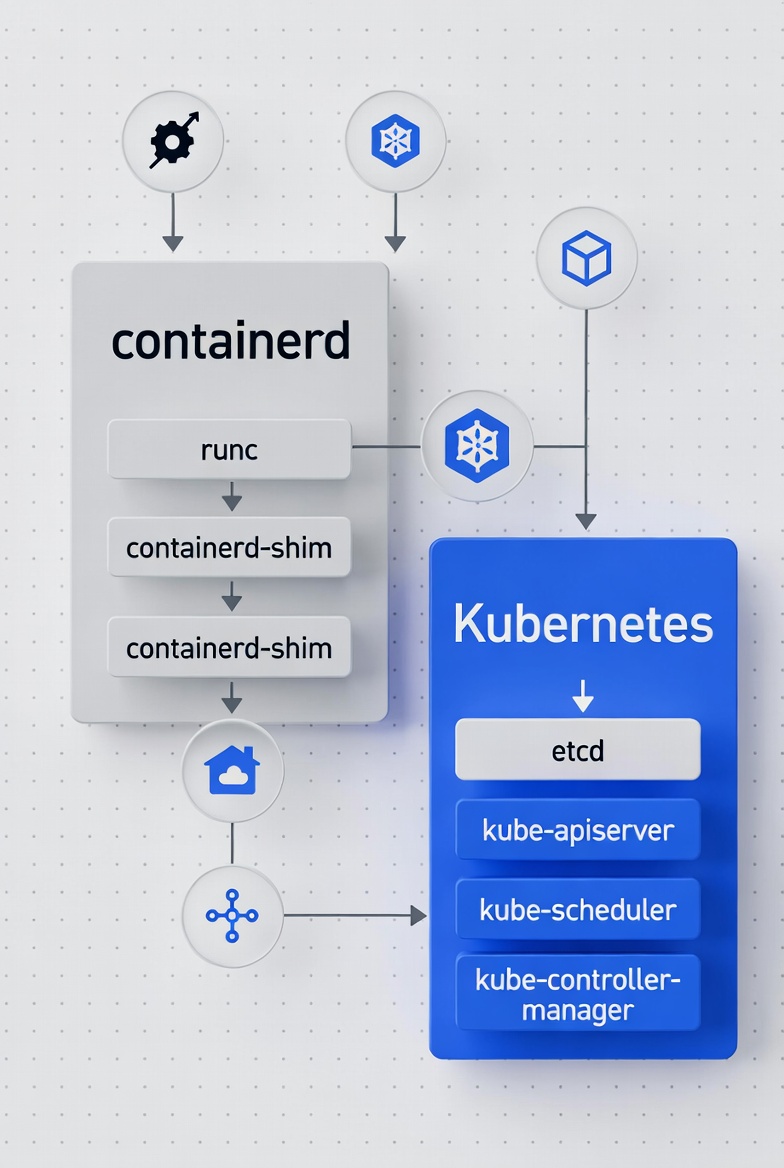
Kubernetes does not run containers directly.
It communicates with a container runtime using the Container Runtime Interface (CRI). That runtime is responsible for:
Pulling container images
Creating and managing containers
Managing container storage
Handling low-level isolation
If the runtime is misconfigured, Kubernetes will fail in strange and frustrating ways.
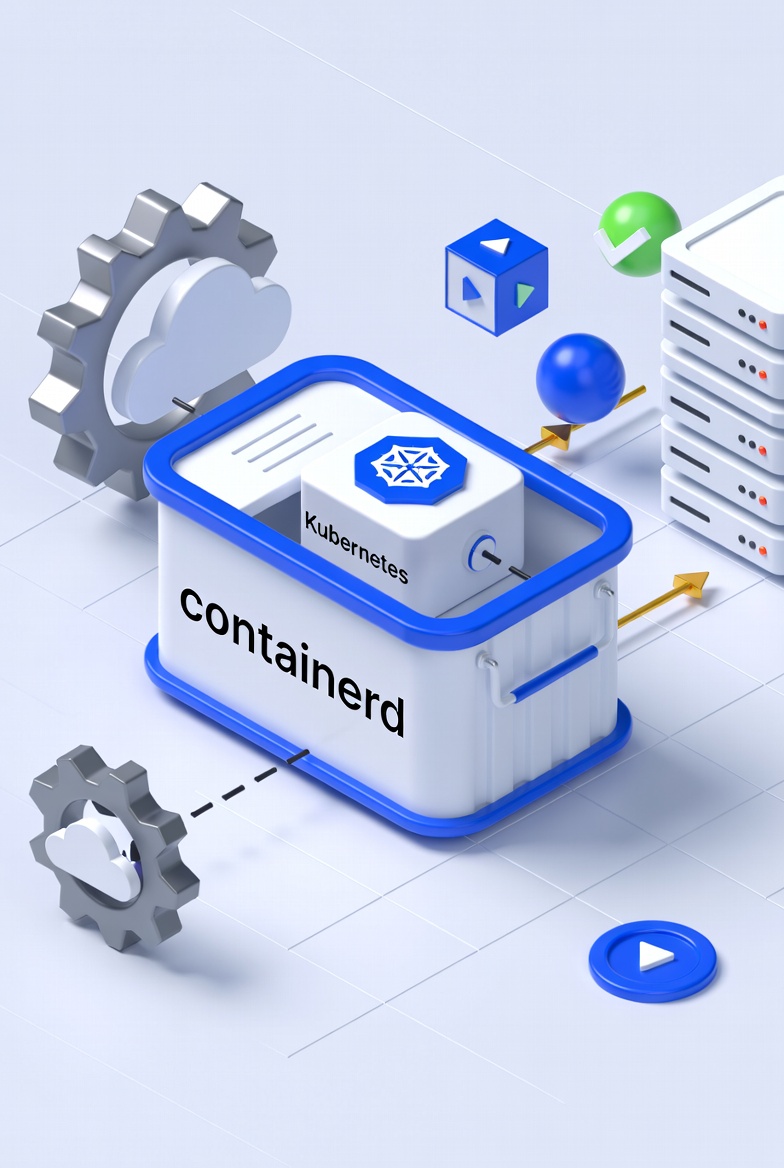
In this guide, we will use containerd as the runtime. It is lightweight, production-ready, and widely adopted in modern Kubernetes environments.
What we will do in this part
Install CNI plugins (required by Kubernetes networking)
Install containerd manually
Configure containerd correctly for Kubernetes
Enable systemd cgroup driver
Install runtime debugging tools (nerdctl and crictl)
Enable IPv4 forwarding
Verify everything before installing Kubernetes
Installing CNI plugins

Kubernetes expects CNI binaries to exist on the node before networking is initialized.
Full Command
mkdir cni_plugins && \
cd cni_plugins/ && \
wget https://github.com/containernetworking/plugins/releases/download/v1.9.0/cni-plugins-linux-amd64-v1.9.0.tgz \
&& tar -xzf cni-plugins-linux-amd64-v1.9.0.tgz \
&& mkdir -p /opt/cni/bin && cp * /opt/cni/bin/
Step-by-Step Breakdown
1. Create a Working Directory
mkdir cni_plugins
What it does:
Creates a directory named cni_plugins.
Why it matters:
This keeps the downloaded archive and extracted files organized and separate from system directories.
2. Change Into the Directory
cd cni_plugins/
What it does:
Moves into the newly created directory so subsequent commands operate inside it.
3. Download the CNI Plugins Archive
wget https://github.com/containernetworking/plugins/releases/download/v1.9.0/cni-plugins-linux-amd64-v1.9.0.tgz
What it does:
Downloads the official CNI plugin bundle from the GitHub release page.
What is included:
The archive contains compiled CNI plugin binaries such as:
bridgehost-localloopbackmacvlanipvlanbandwidthportmaptuning
These binaries provide the fundamental networking capabilities required by Kubernetes.
4. Extract the Archive
tar -xzf cni-plugins-linux-amd64-v1.9.0.tgz
Flag explanation:
-x— extract files-z— decompress gzip-f— specify the archive file
This extracts the plugin binaries into the current directory.
5. Create the CNI Binary Directory
mkdir -p /opt/cni/bin
What it does:
Creates the directory where Kubernetes expects CNI plugin binaries to be located.
Why /opt/cni/bin:
By default, kubelet looks for CNI plugin executables in:
/opt/cni/bin
If this directory does not exist or does not contain the plugins, pod networking will fail.
The -p flag ensures:
Parent directories are created if missing
No error occurs if the directory already exists
6. Copy the Plugins into the CNI Directory
cp * /opt/cni/bin/
What it does:
Copies all extracted plugin binaries into /opt/cni/bin.
Why this is required:
When Kubernetes creates a Pod, the kubelet invokes the appropriate CNI plugin binary from this directory to:
Configure container networking
Assign IP addresses
Attach network interfaces
Apply routing rules
Without these binaries in the expected location, the CNI integration will not function.
Understanding the Command Chaining
&&
Ensures that each command runs only if the previous command succeeds.
This prevents partial or inconsistent installations.
\
Line continuation character used to improve readability across multiple lines.
What This Command Accomplishes
After execution:
The CNI plugin bundle is downloaded
The archive is extracted
The binaries are installed in
/opt/cni/binKubernetes can invoke these plugins for pod networking
Note that this installs only the CNI plugin binaries.
You still need:
A CNI configuration file in
/etc/cni/net.d/(will be created during cluster bootstrap)A networking implementation such as Flannel, Calico, or Cilium (we will use Calico in this series)
Summary
Step | Command | Purpose |
|---|---|---|
1 |
| Create workspace |
2 |
| Enter workspace |
3 |
| Download CNI plugin bundle |
4 |
| Extract binaries |
5 |
| Create CNI binary directory |
6 |
| Install plugin binaries |
Installing containerd
Downloading containerd and runc
1. Download the containerd Release Archive
Containerd releases are published on the official GitHub repository.
wget https://github.com/containerd/containerd/releases/download/v2.0.5/containerd-2.0.5-linux-amd64.tar.gz
This downloads the precompiled containerd binaries for Linux (amd64 architecture).
2. Download the systemd Service File
The containerd.service file is included in the containerd release repository.
You can download it directly:
wget https://raw.githubusercontent.com/containerd/containerd/main/containerd.service
This file allows systemd to manage containerd as a service.
3. Download runc (OCI Runtime)
Containerd relies on runc to create and run containers.
Download the latest compatible release from the official repository:
wget https://github.com/opencontainers/runc/releases/download/v1.4.0/runc.amd64
After downloading, make it executable:
chmod +x runc.amd64
What You Should Have After These Steps
You should now have:
containerd-2.0.5-linux-amd64.tar.gzcontainerd.servicerunc.amd64
These files are required before proceeding with extraction and installation.
Installation steps:
Commands
tar Cxzvf /usr/local/ containerd-2.0.5-linux-amd64.tar.gz
cp containerd.service /usr/lib/systemd/system/
install -m 755 runc.amd64 /usr/local/sbin/runc
mkdir /etc/containerd
containerd config default > /etc/containerd/config.toml
Step-by-Step Breakdown:
1. Extract the containerd archive
tar Cxzvf /usr/local/ containerd-2.0.5-linux-amd64.tar.gz
What it does:
tar— archive utilityC— change to directory before performing operationsx— extractz— decompress gzipv— verbose outputf— specify archive file
Effect:
Extracts the containerd binaries directly into /usr/local/.
This typically places:
containerdcontainerd-shimctr
into:
/usr/local/bin/
Why /usr/local/:
This is a standard location for locally installed binaries that are not managed by the OS package manager.
2. Install the systemd Service File
cp containerd.service /usr/lib/systemd/system/
What it does:
Copies the containerd.service unit file into the systemd service directory.
Why this is required:
Systemd uses unit files to manage services.
Placing the file in /usr/lib/systemd/system/ allows systemd to:
Start containerd at boot
Manage its lifecycle
Track logs and failures
⚠ After this step, you can manage containerd as below but DON'T run these commands yet:
systemctl daemon-reload
systemctl enable containerd
systemctl start containerd
3. Install runc
install -m 755 runc.amd64 /usr/local/sbin/runc
What it does:
Installs the
runcbinary into/usr/local/sbin/Sets permissions to
755(owner can write; others can read/execute)
What is runc:
runc is the low-level container runtime responsible for:
Creating containers
Applying namespaces
Applying cgroups
Starting container processes
containerd uses runc to actually run containers according to the OCI specification.
Why /usr/local/sbin:
sbin directories typically store system-level administrative binaries.
4. Create the containerd Configuration Directory
mkdir /etc/containerd
What it does:
Creates the directory where containerd configuration files are stored.
Why /etc/containerd:
/etc is the standard location for system configuration files.
5. Generate the Default Configuration File
containerd config default > /etc/containerd/config.toml
What it does:
Runs
containerd config defaultOutputs the default configuration
Redirects it into
/etc/containerd/config.toml
Why this matters:
This creates a baseline configuration file that you can customize.
Common modifications for Kubernetes environments include:
Enabling
SystemdCgroup = trueConfiguring registry mirrors
Adjusting snapshotter settings
What These Steps Accomplish
After completing these steps:
containerd binaries are installed
systemd is configured to manage containerd
runc is installed as the OCI runtime
A default containerd configuration file exists
At this point, containerd can be started and used as the container runtime for Kubernetes.
Section Summary:
Step | Command | Purpose |
|---|---|---|
1 |
| Extract containerd binaries |
2 |
| Install systemd unit file |
3 |
| Install OCI runtime |
4 |
| Create config directory |
5 |
| Generate default config |
Configuring containerd for Kubernetes
Edit the configuration:
vim /etc/containerd/config.toml
1. Change the data root
Find the below line which is usually in the first couple of lines:
root = '/var/lib/containerd'
Replace with:
root = '/home/containerd_data'
This ensures container runtime data is stored on the dedicated mount created in Part 1.
2. Configure pause image (if using private registry)
If you use a private registry, configure the sandbox image:
[plugins.'io.containerd.cri.v1.images'.pinned_images]
  sandbox = '<private_registry>/pause:3.10'
⭕If using public registry, this section can remain default.
3. Enable systemd cgroups (Critical)
Find the runtime section and ensure:
[plugins.'io.containerd.cri.v1.runtime'.containerd.runtimes.runc.options]
    SystemdCgroup = true
This is essential because:
kubelet uses systemd as cgroup driver
Mismatch causes kubelet startup failures
🟠 Kubelet may automatically configure this property later on cluster bootstrap, but we explicitly declare it to avoid unnecessary conflicts.
This is one of the most common mistakes in Kubernetes setups.
Starting containerd
Enable and start the service:
systemctl enable --now containerd
systemctl status containerd
Ensure:
Service is active (running)
No immediate errors
Installing nerdctl and crictl

These tools help you debug container runtime issues.
1. Download crictl
crictl is a CLI for interacting with Kubernetes CRI-compatible runtimes such as containerd.
wget https://github.com/kubernetes-sigs/cri-tools/releases/download/v1.33.0/crictl-v1.33.0-linux-amd64.tar.gz
2. Download nerdctl
nerdctl is a Docker-compatible CLI for containerd.
wget https://github.com/containerd/nerdctl/releases/download/v2.2.1/nerdctl-2.2.1-linux-amd64.tar.gz
3. Extract binaries:
tar Cxzvf /usr/local/bin/ nerdctl-2.0.5-linux-amd64.tar.gz
tar Cxzvf /usr/local/bin crictl-v1.33.0-linux-amd64.tar.gz
Create configuration for crictl:
vim /etc/crictl.yaml
Add:
runtime-endpoint: unix:///run/containerd/containerd.sock
image-endpoint: unix:///run/containerd/containerd.sock
timeout: 10
debug: true
pull-image-on-create: false
This ensures crictl communicates correctly with containerd.
Enabling IPv4 forwarding
Kubernetes requires packet forwarding to be enabled.
Edit:
vim /etc/sysctl.conf
Set:
net.ipv4.ip_forward = 1
Apply changes:
sysctl -p
systemctl daemon-reexec
systemctl daemon-reload
Final verification before installing Kubernetes

Run:
crictl info
You should see:
Runtime connected
containerd information displayed
Also verify:
systemctl status containerd
If containerd is running and crictl connects successfully, your runtime layer is ready.
What’s next
In Part 3, we will install Kubernetes components (kubeadm, kubelet, and kubectl) and prepare the node for cluster initialization.


